Adam
  Member #36
Posts: 1,528
|
Post by Adam on Nov 18, 2007 14:28:45 GMT -5
We have a Hypertherm plasma cutter at work. Its badass. I could never build what youre set out to do, but its one of the most badass projects Ive seen. Good luck dude.
|
|
|
|
Post by 1tonflattie on Nov 20, 2007 0:06:51 GMT -5
thanks. i have worked on a few plasma cutters in hypertherm seems to be the best. We bought ours a few years ago used - powermax 900 (55 amp)- since then it has been replaced by the powermax 1000 which is a 60 amp machine but nonetheless it has worked out awesome. i like the hypertherm torch a lot better then the thermal dynamics that is for sure. anyway my dsl internet router modem went bad friday night, right now im on 26.4 dial up so no picture updates but i did finish boxing the frame and finished the suspension. I still have to box the engine mount brackets. I don;t think im going to strap the bottom of the frame like i initially planned (I was going to run 1/8"x2" band iron down the bottom of the frame rails); boxing the frame porbably added 5X the original strength, strapping the bottom of the frame would not add much aditional strength but would add extra weight, and a spot for moisture and crap to sit and eventually rot the frame from the inside out. not to mention it will be a lot more grinding and welding ill try to update sometime this week with pictures if i can make it to someones house with real internet. my new router should be in next monday. hope everyone has a good thanksgiving. and maybe se some of you out on the trail on friday  (in my cherokee) |
|
|
|
Post by 1tonflattie on Nov 20, 2007 22:32:13 GMT -5
ok im at my buddys housing pimping his cable internet so i figured id throw an update for any of you that are checking this out regularly here the rear crossmember done (except for the top) 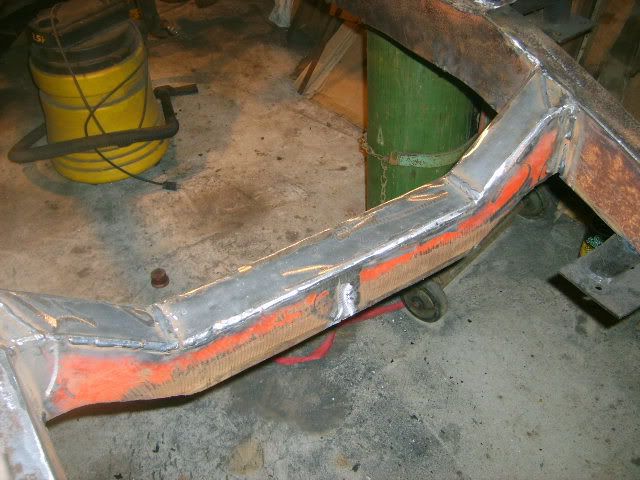 and the rest of the frame, from the rear  ok heres the front shackle hanger, i drilled the holes with a hole saw and half inch chuch wrist snapper drill. The bushing and sleeves are pretty standard builder bushings  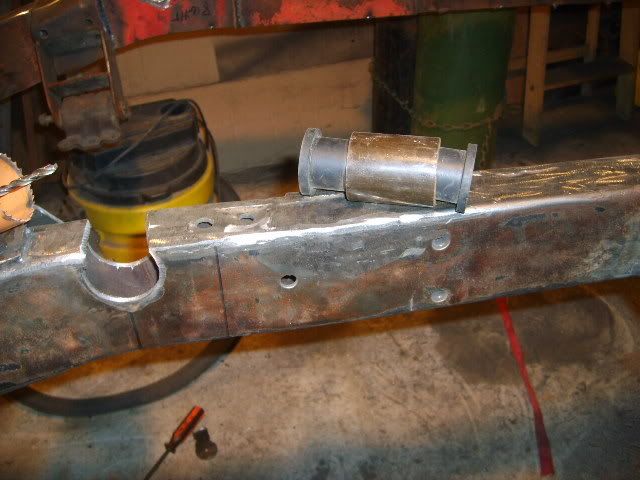  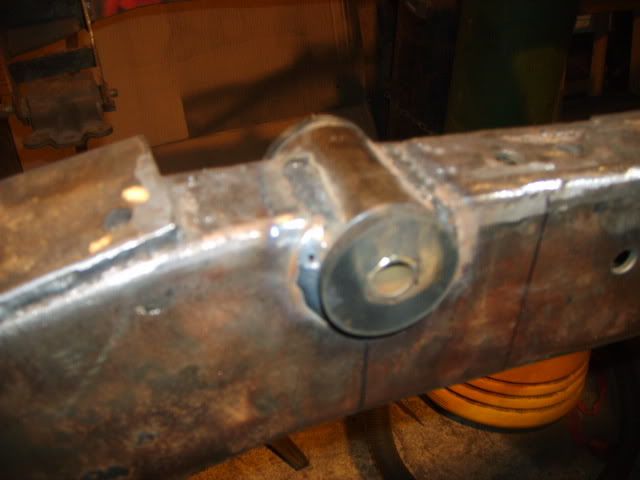 and I plated the engine mounts for some extra ridgidity 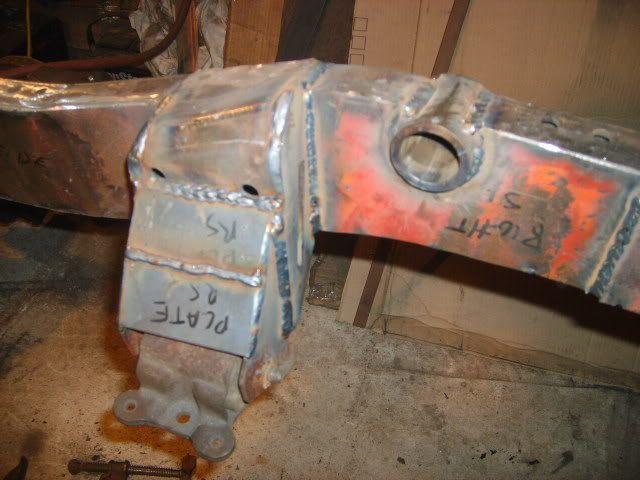 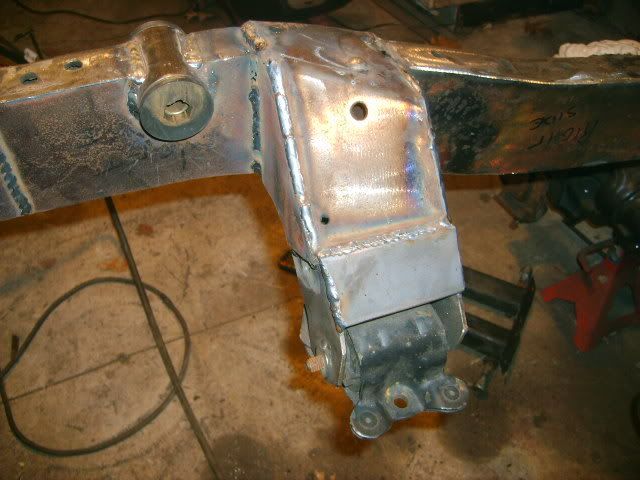 whoring my welds   and my PM900 ;D ;D ;D ;D  thats it for now |
|
|
|
Post by HeavyMetal on Nov 27, 2007 16:52:04 GMT -5
keep the updates cominggg
|
|
|
|
Post by 1tonflattie on Nov 27, 2007 17:17:32 GMT -5
ok had a nice 4 day weekend and got a lot done, and my new wireless router is hooked up so im back online: bought a new DeWalt 10 amp angle grinder at Home Guido finished welding and smoothing the frame and bolted in the d60 front built the rear leaf packs 2 coats of paint on the frame started working on the tub but no new pics, the batteries are dead in my camera again and im ready to smash it  ill try and get some tonight or tomorrow morning for all you flatfender lovers |
|
|
|
Post by Dr. Thunder on Nov 27, 2007 22:16:08 GMT -5
what, all that progress and no pics? love the build, keep it coming
|
|
|
|
Post by 1tonflattie on Nov 27, 2007 23:42:04 GMT -5
what, all that progress and no pics? love the build, keep it coming haha i know i know no time to take pictures, just kidding. my digital camera really aggrivates me. honestly the batteries go dead after taking like a dozen pictures at best. ill try to get some more tomorrow didnt do much tonight except move parts from my friends barn to my shop. found out that there are some important differences between full size chevy and s10 steering columns and theres no much room under the hood for a brake booster. im starting to get into some of the more complicated parts of this build i think i did manage to strip most of the old wire loom and tape off of my wiring harness (out of a 88 s10 TBI 5 speed) which believe it or not takes a long time! tomorrow ill be getting the spring perches for the rear and ring and pinioon set for the front. and hopefully AA batteries |
|
|
|
Post by 1tonflattie on Nov 29, 2007 0:03:22 GMT -5
update: its sitting on 4 wheels and still no pics i need a battery sponsor, ill get some tomorrow i promise did some online window shopping tonight. i picked out the gauges i want to run: Autometer Traditional Chrome. Im running the stock 0-60 speedometer i think these compliment and look stock  also did some measuring and i think im going to be rocking an aluminum radiator and fuel cell from summit. the radiator is 23.875"W x 16"H x 1.75 Thick and a good price. 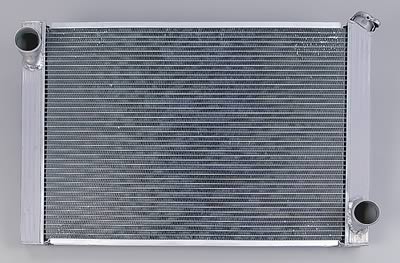 Theres a Drag Race radiator thats about the same but 3" thick which i think would be overkill for my stock 4.3 The fuel Cell is a Summit Pro Street 16 Gallon which i plan to mount in the rear of the Tub.  Dimensions are 17" x 25" x 9" from summit: "Our Pro Street cells have features like seamless polyethylene construction for outstanding impact resistance, available aviation foam filling to prevent fuel slosh and aeration, and a one-way flapper valve vent in the cap, to allow air to displace fuel as it's being used. Ideal for street use, they include a 0-90 ohm sending unit for use on GM-type fuel level gauges. Other features include flush mount aircraft-type lids, two -8 AN outlets, and a -6 AN vent fitting. And best of all, you get all of this for a very affordable price. " ok thats it |
|
|
|
Post by Dr. Thunder on Nov 29, 2007 0:10:53 GMT -5
dont forget a tranny cooler....  sweet parts. aluminum radiator ftw. |
|
|
|
Post by 1tonflattie on Nov 29, 2007 17:26:20 GMT -5
dont forget a tranny cooler....  sweet parts. aluminum radiator ftw. yea i have the one from my old truck, might have to get a bigger one tho, becasue in my truck i ran it through the radiator and tranny cooler. i'll be able to keep a good eye on it the b&m transmission temp guage AA batteries are here, ill post up later |
|
|
|
Post by 1tonflattie on Nov 29, 2007 23:36:54 GMT -5
ok today i got an energizer e^2 charger and batteries and they work awesome in my camera so i was able to snap some pics heres a picture of the frame, with the axles bolted in. Unfortunately its dark out but you get the idea. The rear springs came out incredibly soft, cant wait to see how they flex. 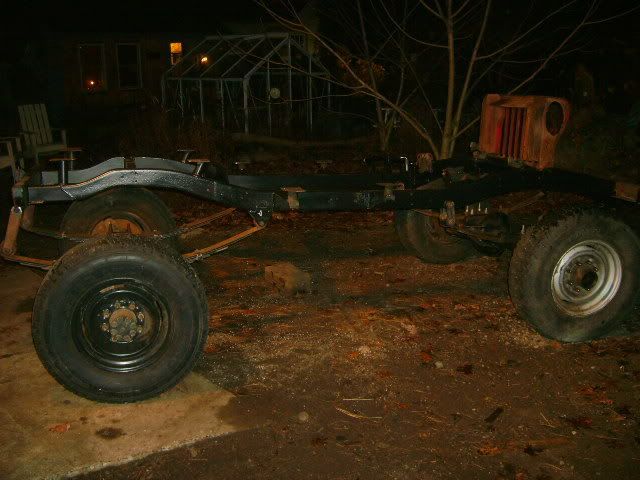 I'll get some daytime pics when I'm around during daylight hours heres some of the body, I havent done much with it yet. This weekend im going to drop the engine and tranny into the frame and make sure the transmission hump is going to clear the big ol 7004r 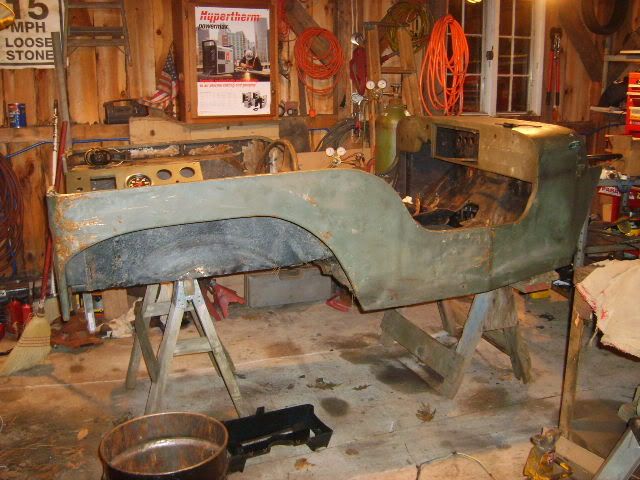 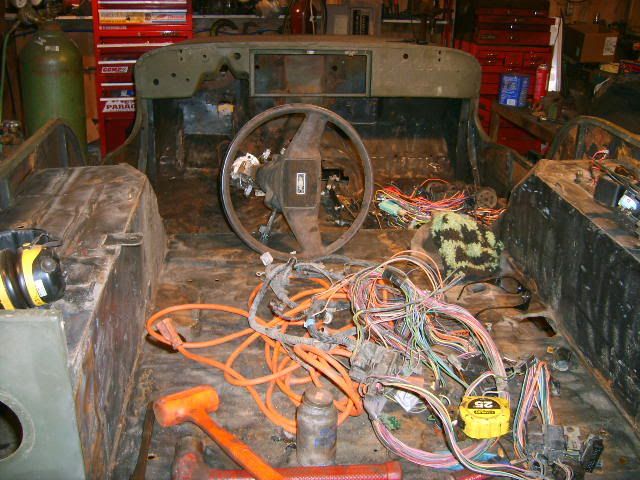  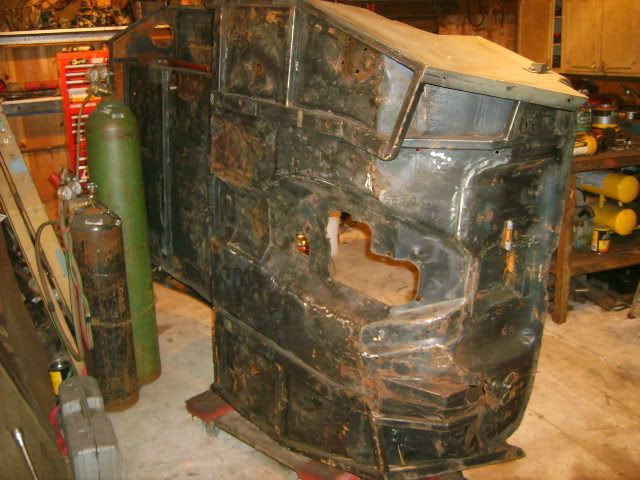 you can see all the reinforcing that the previous owner did to the tub using 1" square tubing these furnature carts are very handy for moving heavy stuff around the garage. some of you might recognize them  heres the body mounts im using. they are engine mounts for a Lincoln SA200, back when Lincoln welders were decent machines 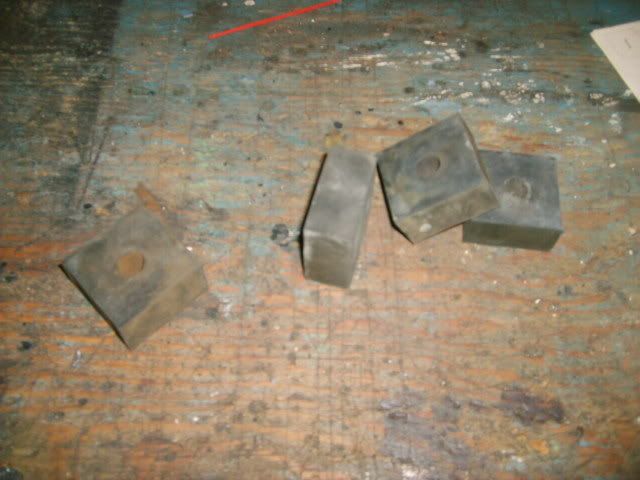 speaking of welders heres my MILLER locker for the D60 front, (until I get the money to buy an ARB) 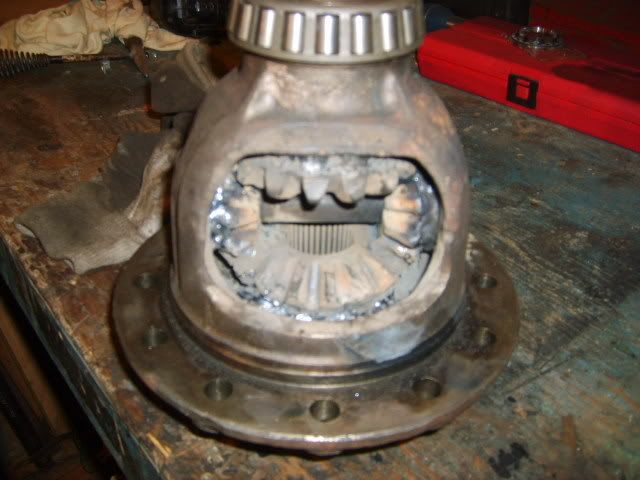 added the Miller emblem  and a whore picture. this machine is nothing fancy but I love welding with it and I does a nice job. best 40 bucks ever spent 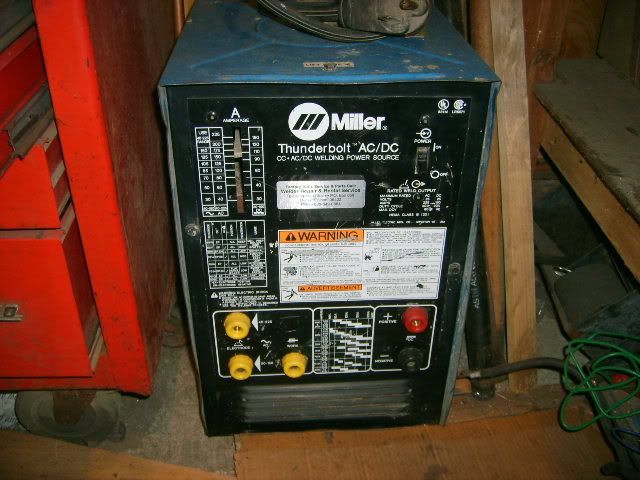 and speaking of D60 fronts ups brought this today  thats it, hope you enjoy, more to come soon |
|
bigburben
Forum User
 Its a killingworth thing, you wouldnt understand...
Posts: 37
|
Post by bigburben on Nov 30, 2007 7:14:17 GMT -5
looks good O
|
|
|
|
Post by 1tonflattie on Nov 30, 2007 23:15:38 GMT -5
putting the engine in: 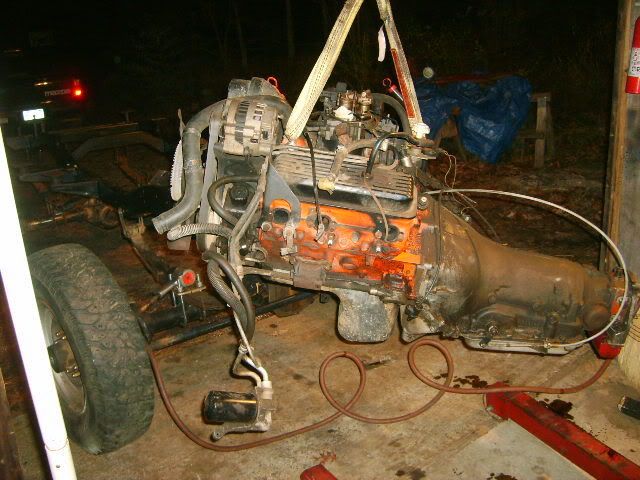  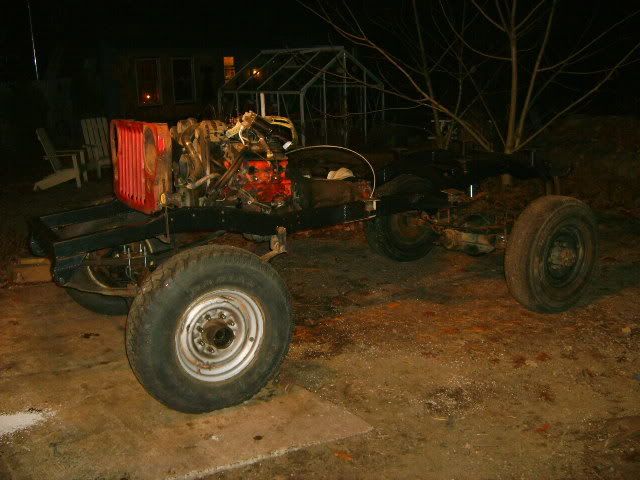  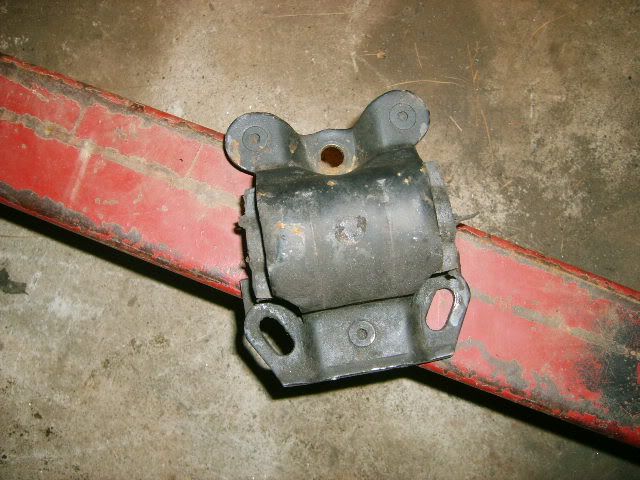 these are the engine mounts...does anyone know what they are for stock? small block chevy? the bad news is i might have to move the frame engine mounts towards the passenger side. The previous owner ran a passenger side drop front axle so it looks like he had the engine sit a little offset toward the drivers side to make room for the front driveshaft. Im running a driver drop front axle and it looks tight. Ill know better tomorrow when I put the transfer case in. another minor issue is the rear being too high but i can lose some length from the shackles for sure more to come this weekend, and i might actually get some daylight pics |
|
|
|
Post by 1tonflattie on Nov 30, 2007 23:18:45 GMT -5
couldn't have done any of this without your help. from getting the jeep home, to loading engines, to general advise i can always count on you  |
|
|
|
Post by 1tonflattie on Dec 1, 2007 11:47:21 GMT -5
mid day update.
transfer case hits the frame. going to pull the engine out and plasma the mounts off and move them over 2" and down 1.5" Pics to follow
|
|